

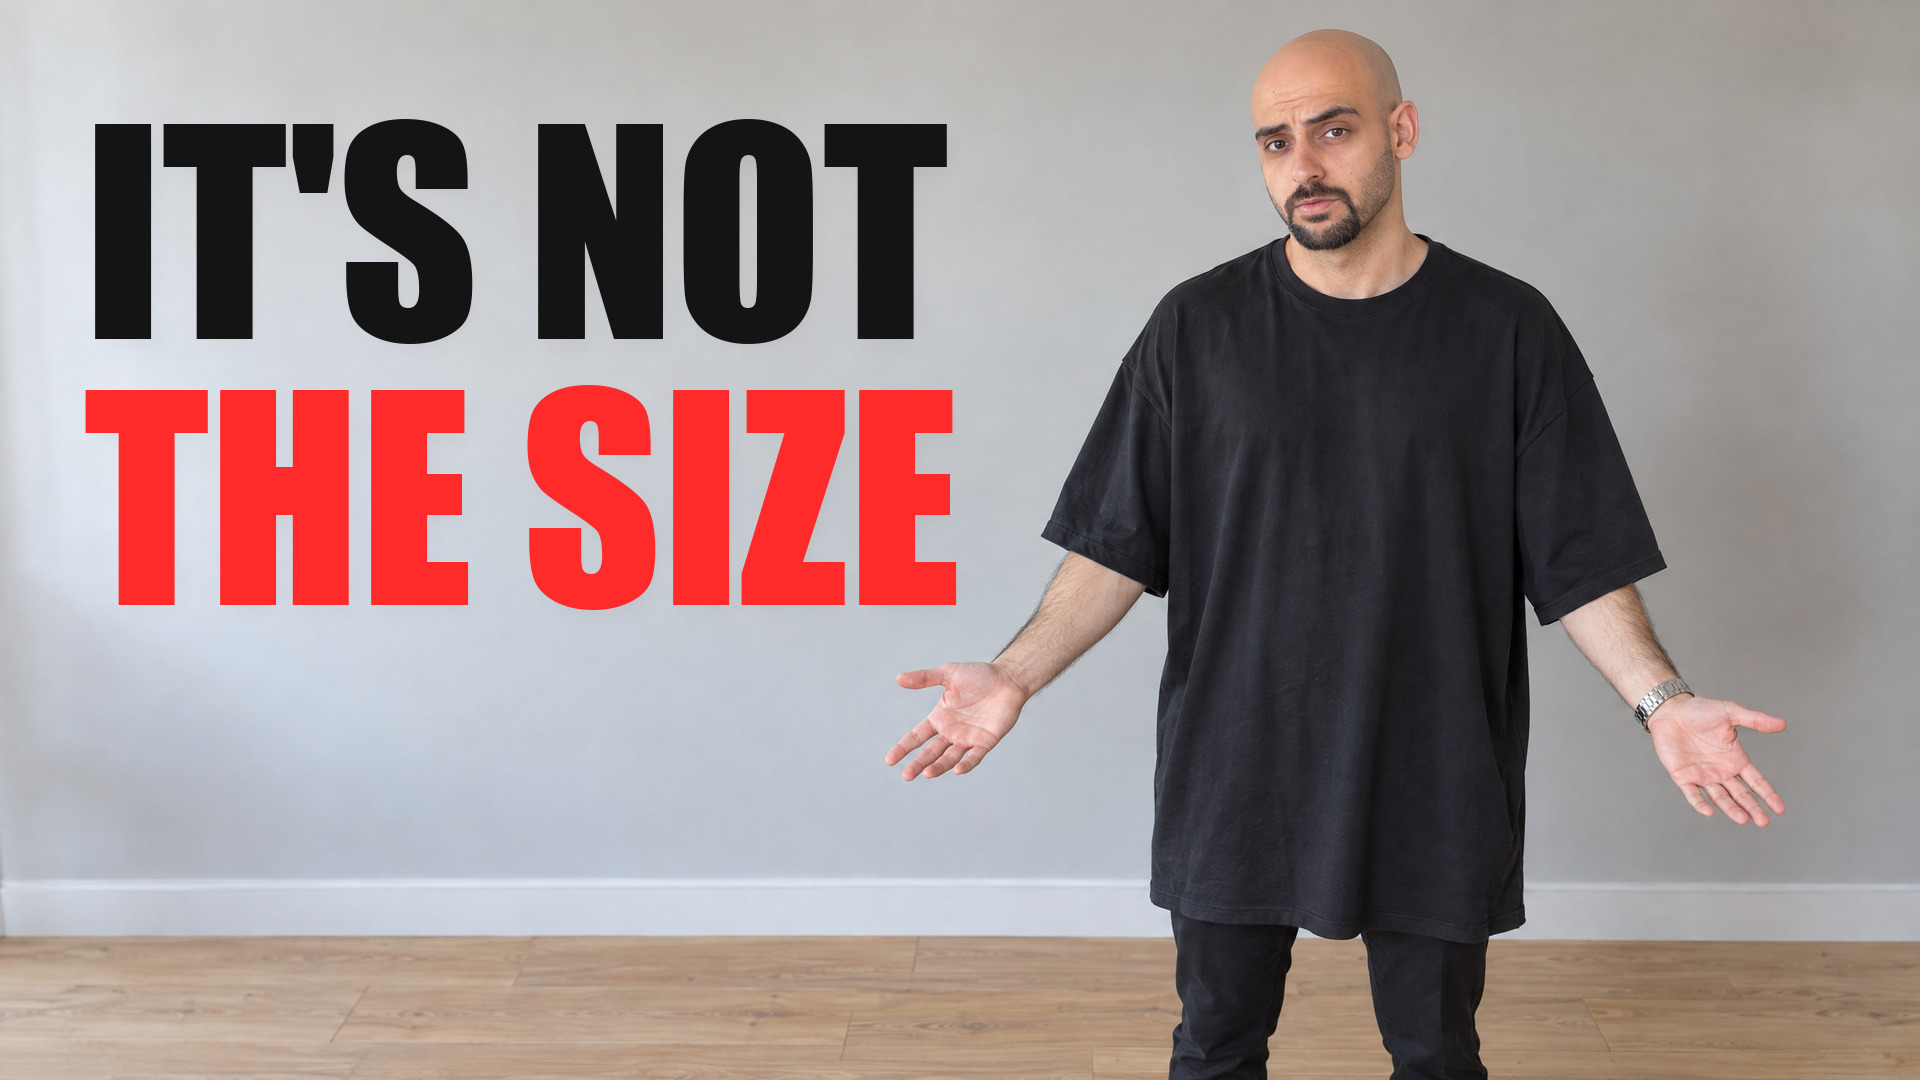
Most "oversized" T-shirts are regular T-shirts sized up one or two sizes. Everything gets bigger, including the length, so you end up with a large T-shirt that hangs like a dress instead of the boxy, dropped shoulder look people are actually buying.
Shadi Adada is the co-founder and creative director of FittDesign, and he has spent the last 10 years building oversized garments. In this episode of FittDesign TV he goes through how an oversized fit is actually designed, starting from a regular block, with the measurements he works with on a size medium.
The short answer: An oversized T-shirt starts from a regular block. You drop the shoulder, widen the chest and shorten the sleeve, while the center back length and the neckline barely move, and every one of those numbers belongs in your tech pack.
Prefer to watch? The full episode is embedded at the bottom of this post, along with the complete script.
Why Sizing Up Isn't Oversized
An oversized look is an intentional look: a boxy body, a dropped shoulder and a neckline that sits exactly where it needs to be. Sizing up a regular tee scales every measurement at once, so the shirt just gets bigger in all directions.
The fix is to start from a regular block and change specific points, in a specific order. Here's each one, with Shadi's numbers for a size medium.
1. Start With the Shoulder
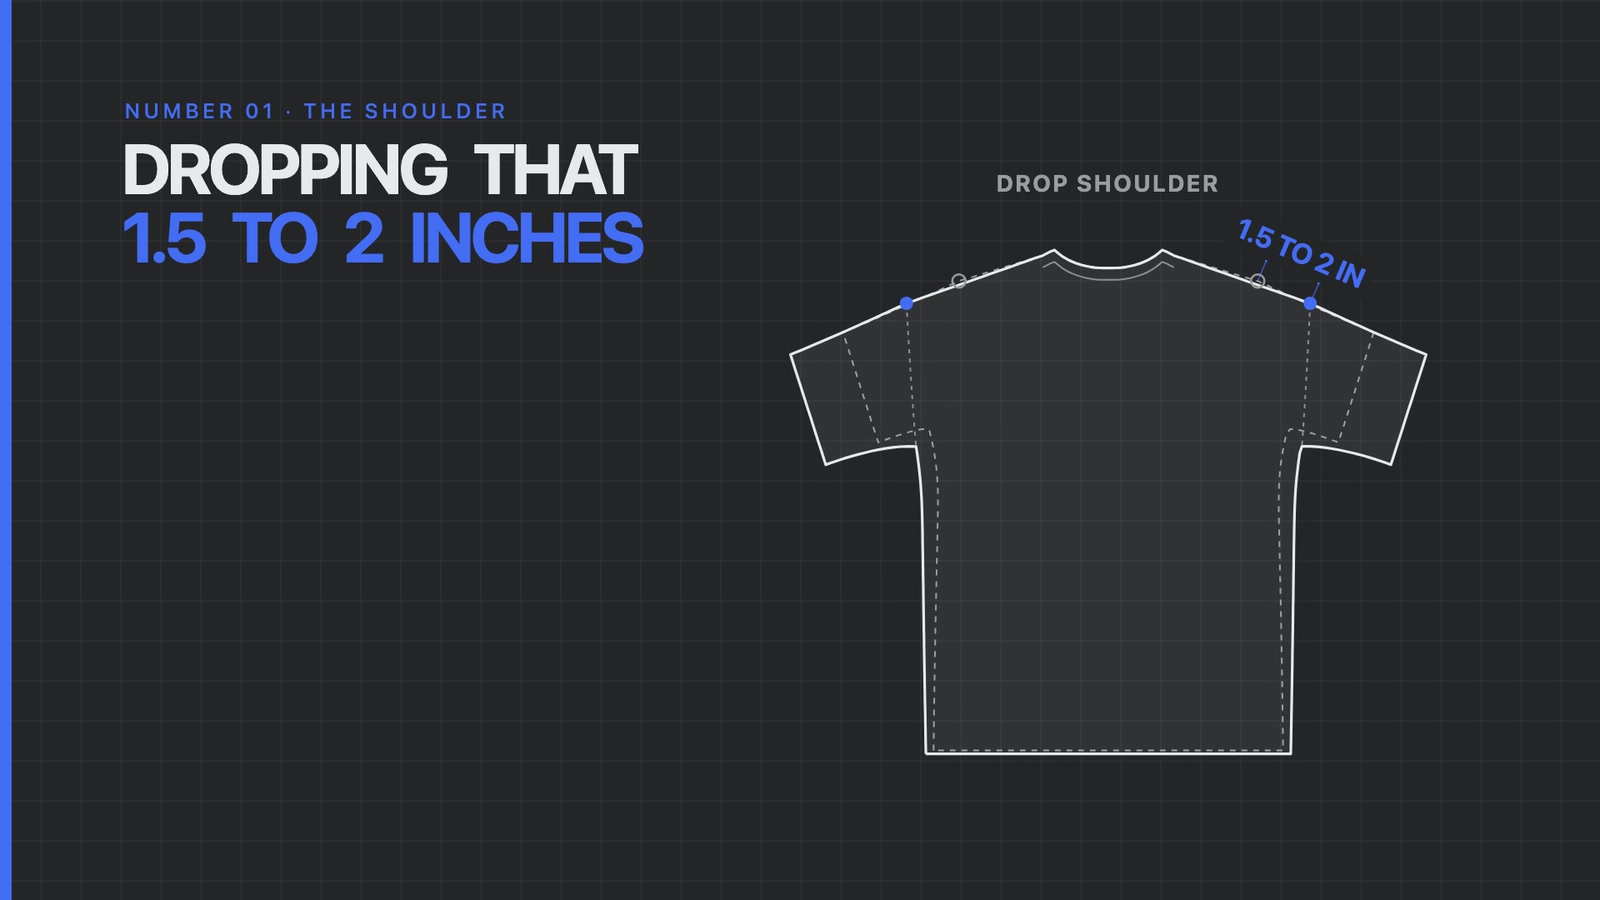
On a regular garment, the shoulder seam sits around the edge of your shoulder bone. A drop shoulder moves that point down the arm by around 1.5 to 2 inches.
- Regular fit, size M: a shoulder length of 4.75 to 5.25 inches.
- Oversized fit, size M: from around 6.5 inches, up to around 7.5 inches.
As the shoulder length goes up, the perpendicular armhole depth drops with it. That's the first starting point for every oversized fit.
2. Widen the Chest, Not the Center Back Length
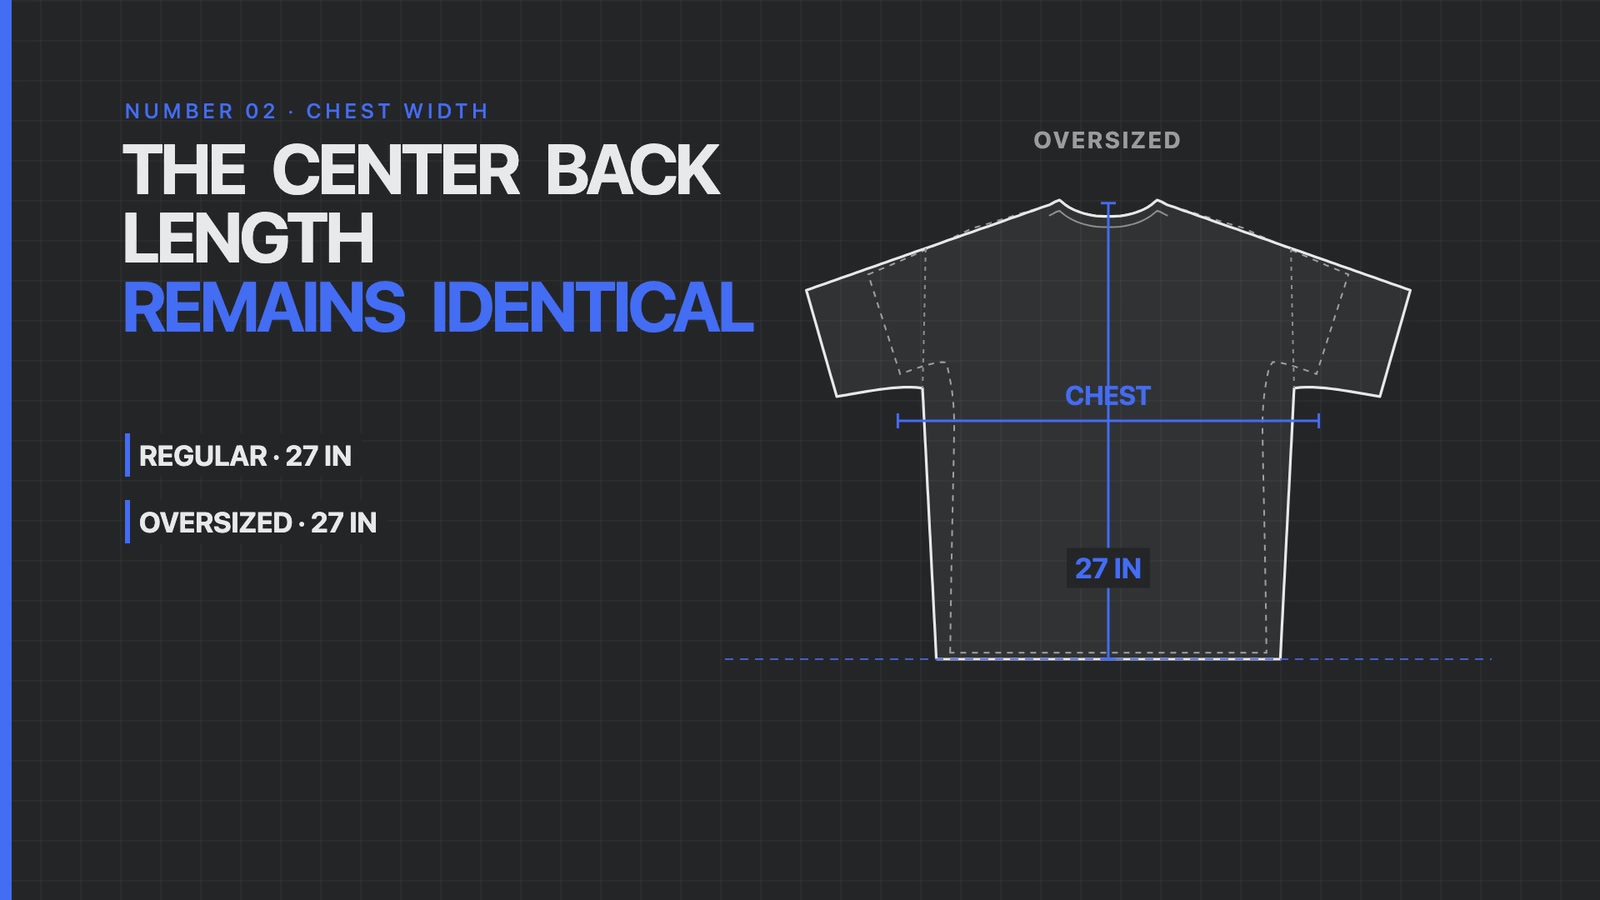
This is the one that surprises people. On a size medium, a regular fit and an oversized fit both sit at around 27 inches on the center back. The length makes minimal movement. The chest is where the big difference is.
- Regular fit: a chest half width of 19.5 inches, up to around 21 inches for a more relaxed cut.
- Oversized fit: around 25 to 25.5 inches.
Rule of thumb from Shadi: an oversized fit isn't about proportionally dragging everything out. Add the same two to three inches to the center back that you added to the chest and you end up with a dress-like look.
3. The Sleeve Gets Shorter
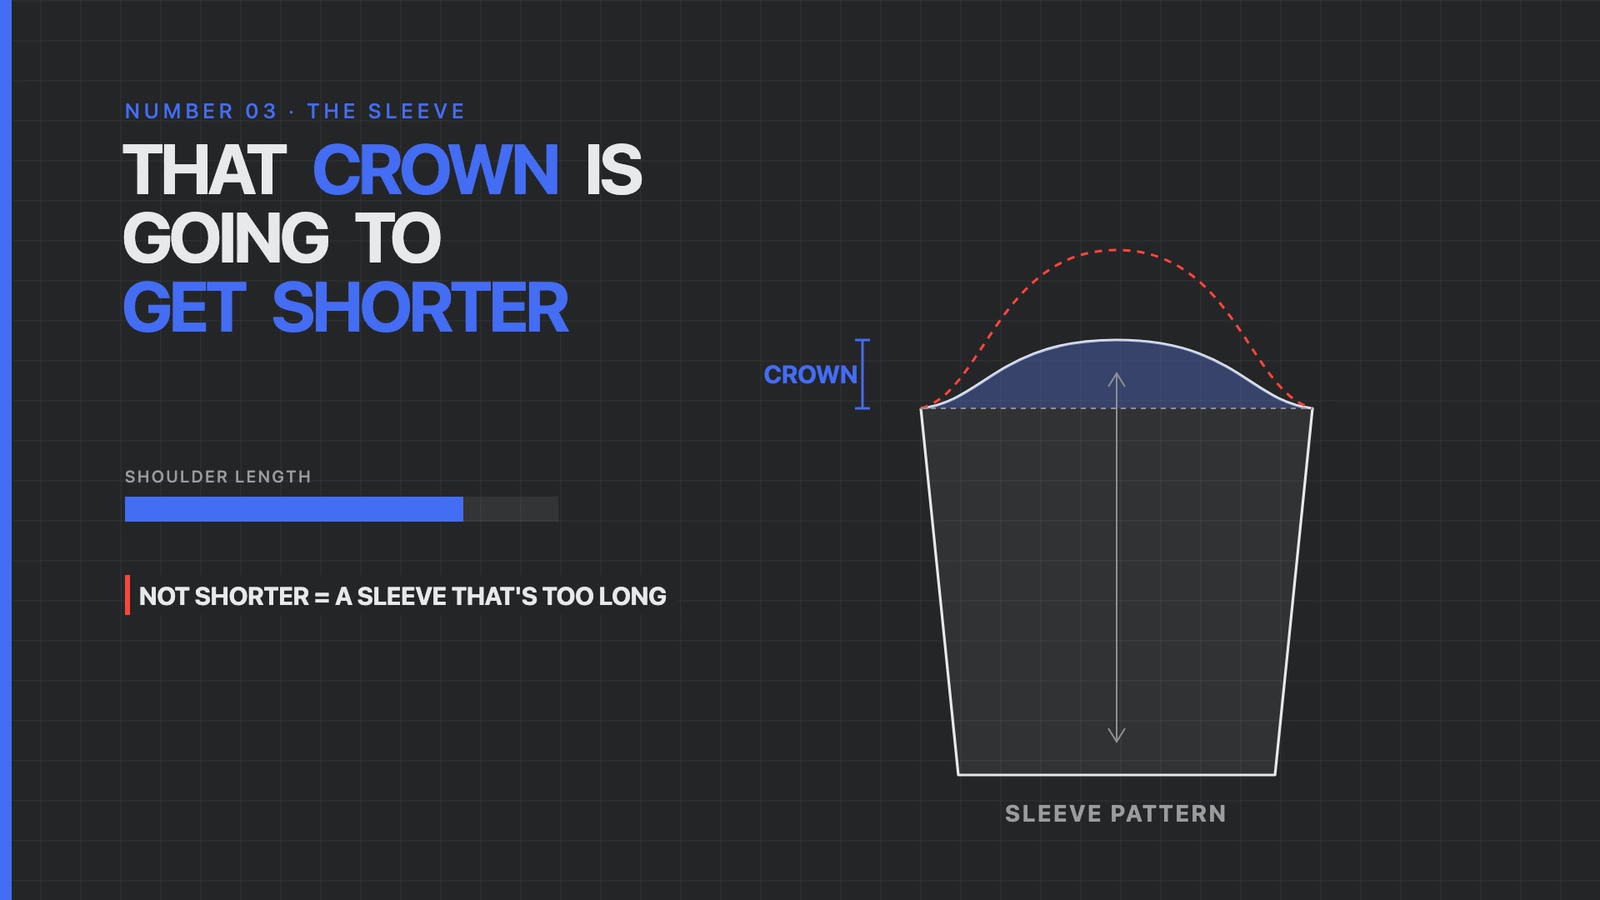
A longer shoulder eats into the crown of the sleeve, the curved top of the sleeve pattern. As the shoulder length goes up, that crown has to get shorter. If it doesn't, you end up with a sleeve that's too long and swallows the arm.
- Regular sleeve: around 8.5 to 9 inches.
- Drop shoulder: somewhere between 7.75 and 8.75 inches, depending on where you want it to hit.
Building an oversized tee for your own brand?
The shoulder drop, the chest width, the sleeve length and the fabric weight all need to be settled before the first sample, or you'll pay for them in sample rounds.
4. The Neckline Barely Moves
The collar half width doesn't grow in proportion with the rest of the garment, even on an oversized fit.
- Neckline half width, size M: 7.5 inches stitch to stitch, not including the collar binding, up to 8 inches for a more relaxed fit.
- Neckline drop from the HPS: around 2 to 2.5 inches, and it stays the same on an oversized fit.
5. More Fabric Needs More Structure
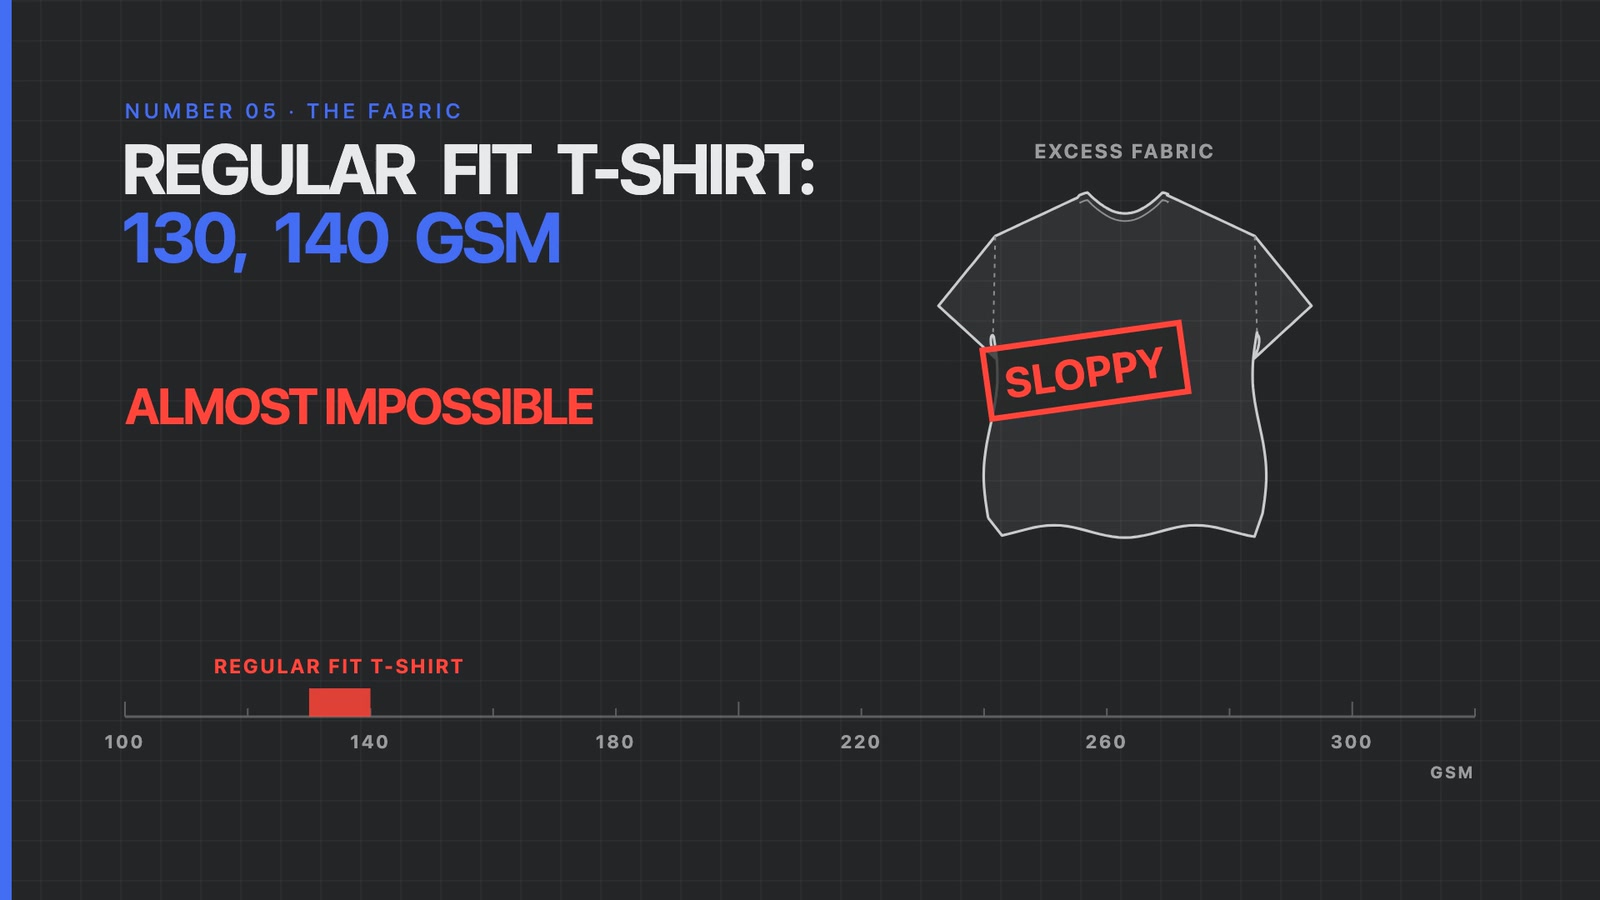
An oversized tee carries more fabric, so it needs more structure. A regular fit T-shirt can get away with 130 to 140 GSM. With the excess fabric of an oversized fit, that weight gives you a sloppy, unkempt look that makes the garment look cheap and almost like a pajama.
- Go for a double jersey, or a single jersey with a higher GSM.
- Start at around 200 GSM at the very bottom end.
- The more oversized and structured the fit, the higher the GSM, up to around 300 GSM on the higher end.
For more on fabric weight, read our guide to GSM.
Bonus: How to Grade an Oversized Fit
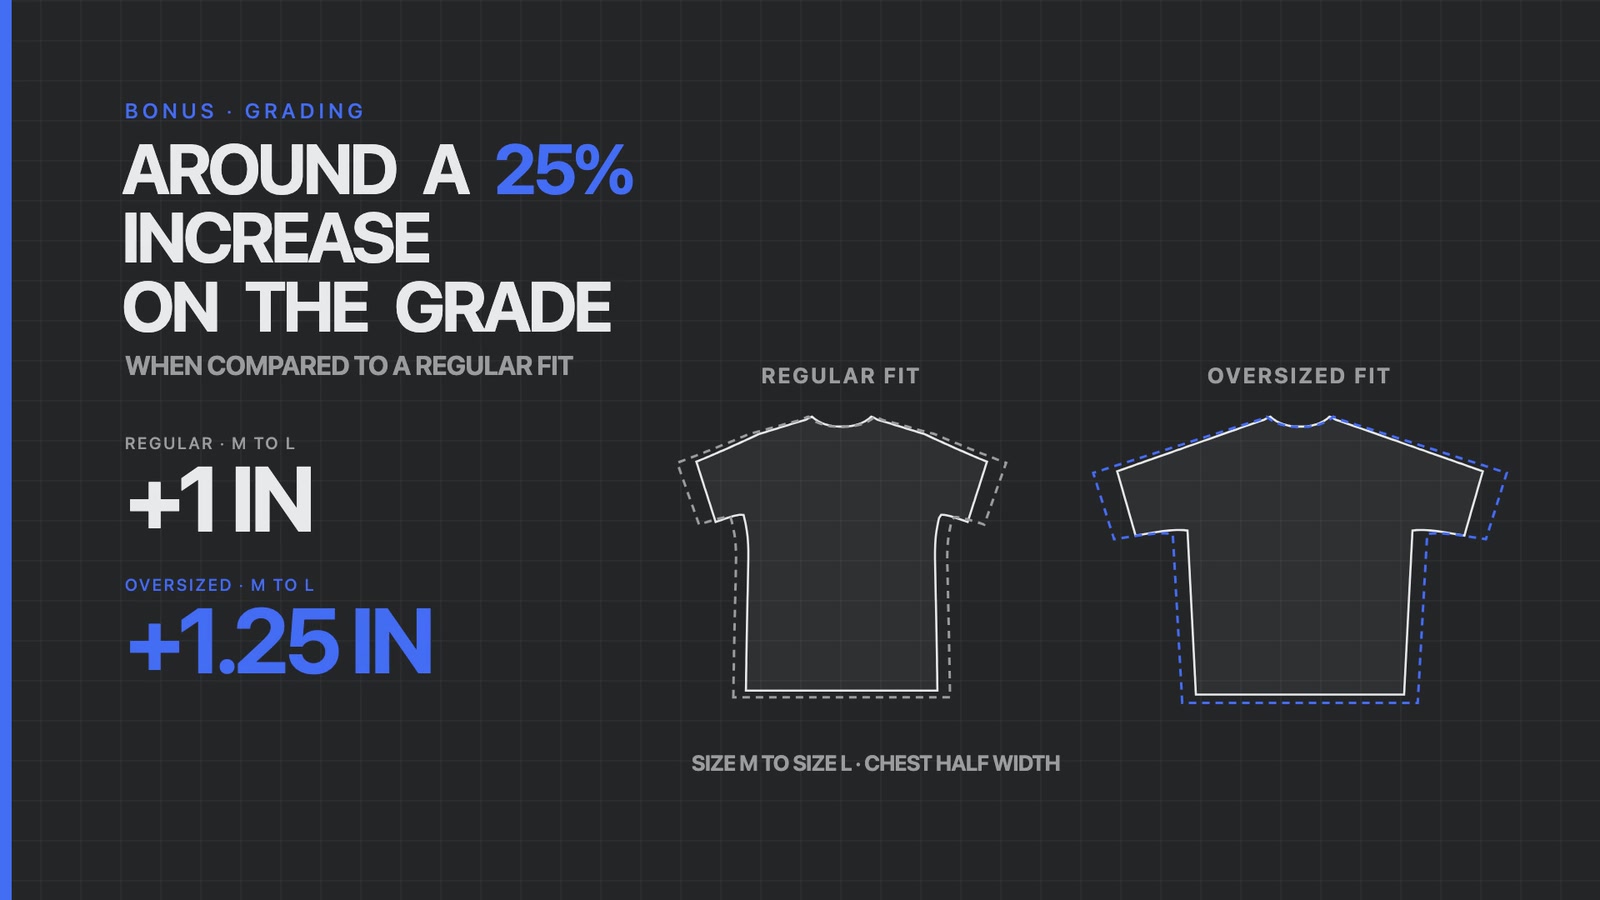
Grading an oversized fit works a lot like grading a regular fit. The difference is the amount. On a regular fit, Shadi's grade on the chest, the waist and the bottom is usually around an inch per size. On an oversized fit he allows around a 25% increase on the grade, so the extra fabric hangs off the body the same way in every size.
Example: if the chest half width grows by 1 inch from size M to size L on a regular fit, Shadi allows around 1.25 inches on the oversized fit.
Be careful at the extremes. On an XS and a 3XL, go back to your regular grade of around an inch. Grade too far and by the time you reach the XS there's just too little fabric, so a customer who wanted an oversized fit ends up with a regular one.
The Verdict: Work in This Order
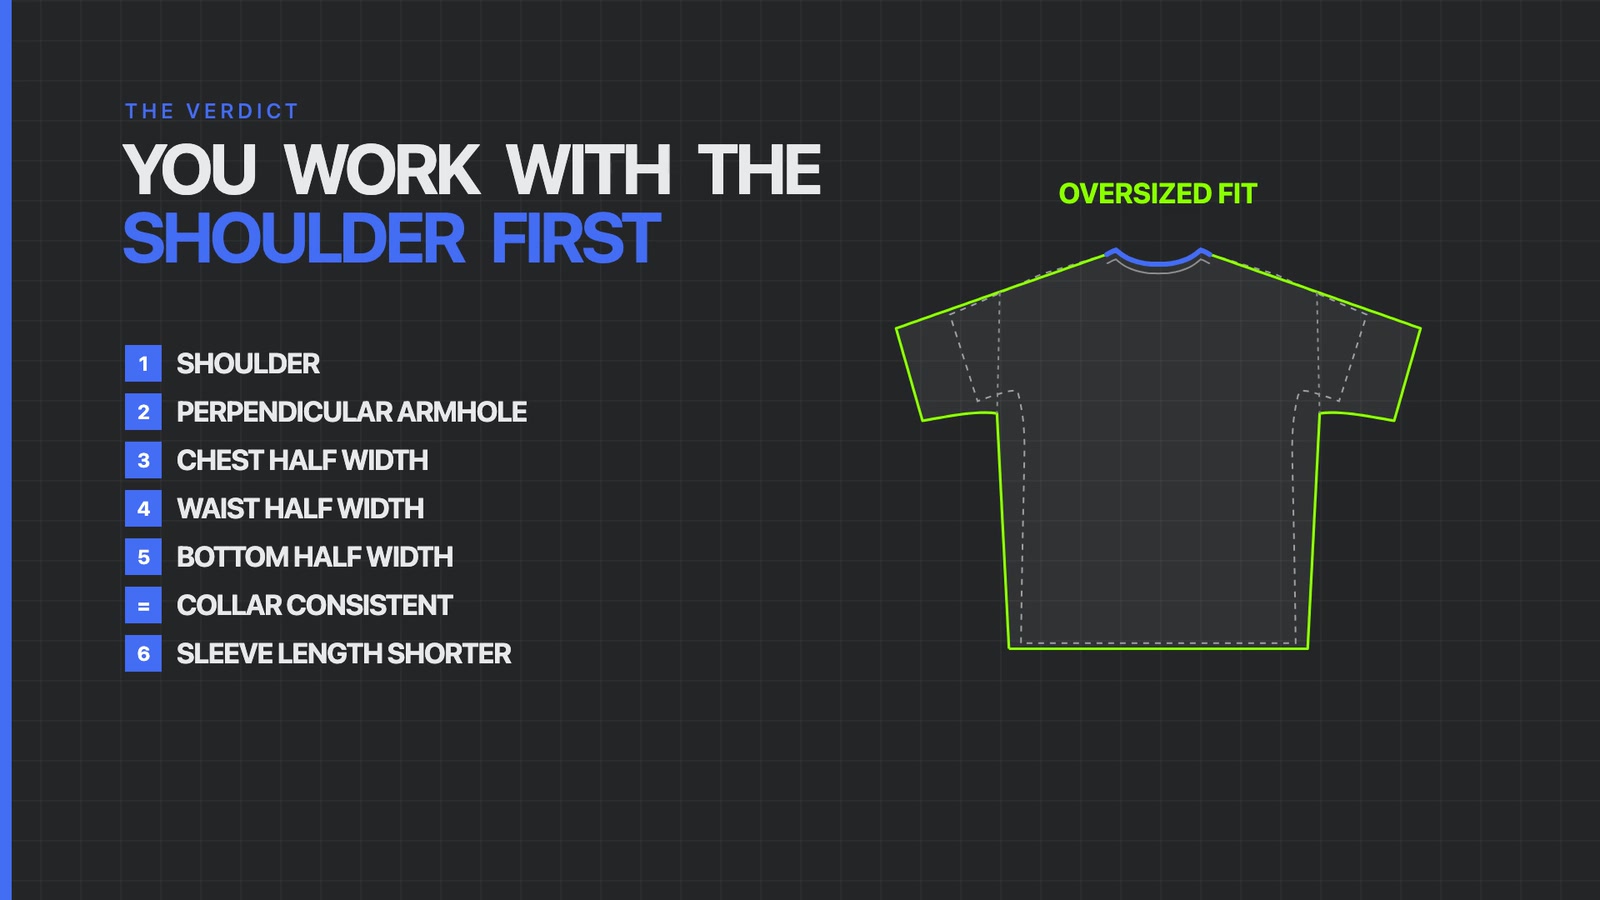
To build an oversized fit from a regular block, Shadi works in this order:
- Shoulder
- Perpendicular armhole
- Chest half width
- Waist half width
- Bottom half width
- Collar stays consistent
- Sleeve length shortens to account for the longer shoulder
Skip this and simply size a regular shirt up or down, and you get a fit that looks off: a dress on a person who should have a nice boxy appearance. All of these measurements end up in the tech pack your factory works from.
🎬 Watch the full episode. Shadi walks through every measurement on screen, with flats traced from our own regular and drop shoulder tech pack templates: https://www.youtube.com/watch?v=sm-wkSpoyK8

Full Episode Script
This is the script of the episode as Shadi delivered it, lightly edited for reading.
Intro
You want the oversized look for your next T-shirt, right? Seems simple on the surface. You just take a regular T-shirt and you scale it up. You maybe size it up one or two sizes and you call it a day.
What you have there isn't an oversized T-shirt. What you have is a large T-shirt. There's a difference there.
An oversized look is a very intentional look. We know it. It's that boxy look. It's the dropped shoulder. It's the neckline that sits exactly where it needs to be. It's that oversized look that makes you look and feel great, and if you're a bodybuilder, it gives you that confidence to go and rip into the gym.
This is the difference between a shirt that has an intentional oversized look, versus a shirt that just looks like the wrong size.
On today's episode, I'll be giving you guys my experience over the last 10 years building oversized garments, and how you can build your own starting with a regular block fit. So without further ado, my name is Shadi Adada. I'm the co-founder and the creative director of FittDesign, and by the end of this episode you'll walk away understanding the main levers you need to pull when designing an oversized piece, starting with a regular fit. Let's get right into it.
1. Start with the shoulder
Number one is that every single oversized fit starts off with a regular block pattern, and we start off with the shoulder. You'll notice that with many regular garments, the shoulder sits somewhere along the edge of your shoulder bone. With a drop shoulder, you're pretty much dropping that around an inch and a half to two inches.
Your typical shoulder length on a size medium shirt will range between 4.75 inches and 5.25 inches on a more regular fit. With an oversized fit, it starts in my experience at around 6.5 inches and can go all the way up to around 7.5 inches for a size medium.
This is the first starting point, and obviously, with increasing the shoulder length, you're also dropping the perpendicular armhole depth.
2. Chest width, not center back length
Number two: once we have the shoulder length increased, we'll now increase the chest width. But just because we're increasing the chest width doesn't necessarily mean that we also increase the center back length. You'd be surprised to know that for an oversized fit and a regular fit, the center back length pretty much remains identical. On a size medium, it's typically 27 inches on the center back. For an oversized fit, it's also 27.
It's the chest that has a big difference. Typically a regular fit ranges from 19.5 inches on the chest half width all the way to 21 inches for a bit more of a relaxed cut. With an oversized fit, it can reach around 25 to 25 and a half inches on a size medium. The center back makes minimal movement throughout this.
This is why we go back to the initial point: increasing your fit isn't just about proportionally dragging everything, because this is where you end up with a dress-like look. If you also increased your center back by that same two to three inches that you did on the chest, that's where you end up with the issue.
3. The sleeve gets shorter
Number three is that the sleeve gets shorter. Once we've increased the shoulder length, that's going to eat into the crown of the sleeve. If you look at the typical pattern of a sleeve, there's what is known as a crown. As you increase the shoulder length, that crown is going to get shorter. If that crown doesn't get shorter, you end up with a sleeve that's too long, a sleeve that ends up swallowing your arm.
Typically on a regular sleeve, you're looking at around eight and a half to nine inches on the sleeve length. With a drop shoulder, you can get somewhere between 7.75 and 8.75 inches, depending on where you want it to hit.
4. The neckline barely moves
Number four is that the neckline barely moves. The collar half width doesn't increase disproportionately across the board, even with an oversized fit. Your typical neckline half width on a size medium ranges from 7.5 inches stitch to stitch, not including the collar binding itself, all the way to 8 inches for a little bit more of a relaxed fit.
The neckline drop from the HPS down to the neckline itself is typically around, let's just say, two inches, 2.5 inches in total. For an oversized fit, that doesn't change. It typically remains the same.
5. More fabric needs more structure
Number five is that with more fabric, you're going to have the need for more structure. So you're going to opt for a heavier weight or a thicker set fabric, either a double jersey or a single jersey with a higher GSM.
With a regular fit T-shirt, you can get away with something at 130, 140 GSM. With the excess fabric, it's almost impossible to get away with that. You just end up with a very sloppy and unkempt look, which makes the garment look cheap and almost like a pajama.
You typically want to go for a double jersey or a higher grade of GSM, starting at around 200 GSM at the very bottom end. The more oversized your fit goes and the more structure you want, the higher the GSM goes, pretty much all the way to around 300 GSM for an oversized T-shirt on the higher end.
Bonus: grading an oversized fit
As a bonus tip, the grading of an oversized fit is somewhat similar to the grading of a regular fit, except for the amount of grade. On the chest, the bottom and the waist of a regular fit, in my experience it's usually around an inch. On an oversized fit, you want to proportionally allow for more fabric hanging off the edge of the person to get the same visual effect, so I typically allow for around a 25% increase on the grade when compared to a regular fit. So if I'm allowing a chest half width increase of one inch between size medium and size large on a regular fit, then I'm allowing around 1.25 inches on an oversized fit.
Where you have to be careful is the extremes. Typically on the extremes, you have an extra small and maybe a 3XL. This is where your grading can go back to what it needs to be, which is around an inch, your regular grade.
The reason for that is if you grade too far on the extremes, you end up swallowing up the overall fit of the garment, and you risk creating a non-oversized fit for someone who is buying an extra small because they want an oversized fit. By the time you reach the measurements of an extra small, there's just too little fabric, and it ends up as a regular fit as opposed to that oversized fit.
The verdict
So what's the verdict here? If you want to create an oversized fit, you work with the shoulder first, then the perpendicular armhole, then the chest half width, the waist half width and the bottom half width. The collar remains consistent, and the sleeve length is going to shorten to account for the increased shoulder length.
If you're not following this, and you're just simply sizing down a regular shirt or sizing up a regular shirt, this is where you end up with a fit that just looks off. It looks like a dress on a person who should have a nice boxy appearance.
Work with us 1-on-1
So if you guys enjoyed this episode and you're looking to launch your own oversized pieces, whether it's a hoodie, a pair of shorts or an oversized T-shirt, and you want to get that perfect fit so you can avoid going back and forth with your manufacturers through endless sample rounds, a factory-ready tech pack is what you're going to be looking for. Having the experience to build it firsthand with the right measurements is what's going to save you that hassle.
You can check out the link in the description to apply to work with us one-on-one, and we can show you how we can help you take your idea and get it made and sampled within 30 days or less. Within five minutes of your inquiry, a real human will get back to you. That's www.fittdesign.com/full-service-production.
I say this from the very bottom of my heart, thank you so much for tuning in to this episode of FittDesign TV. Until next week's episode, stay awesome.
About FittDesign
FittDesign is a full-service clothing design and production studio. Over the last 10 years the team has helped thousands of brands design, develop and produce their collections, from the first sketch to factory-ready tech packs and samples.
Ready to build an oversized fit that looks intentional?
Tell us about your idea and a real human will get back to you within five minutes. We can help you get it made and sampled within 30 days or less.
Get a quote → Takes 2 minutes. No obligation.


